Image Source: pexels
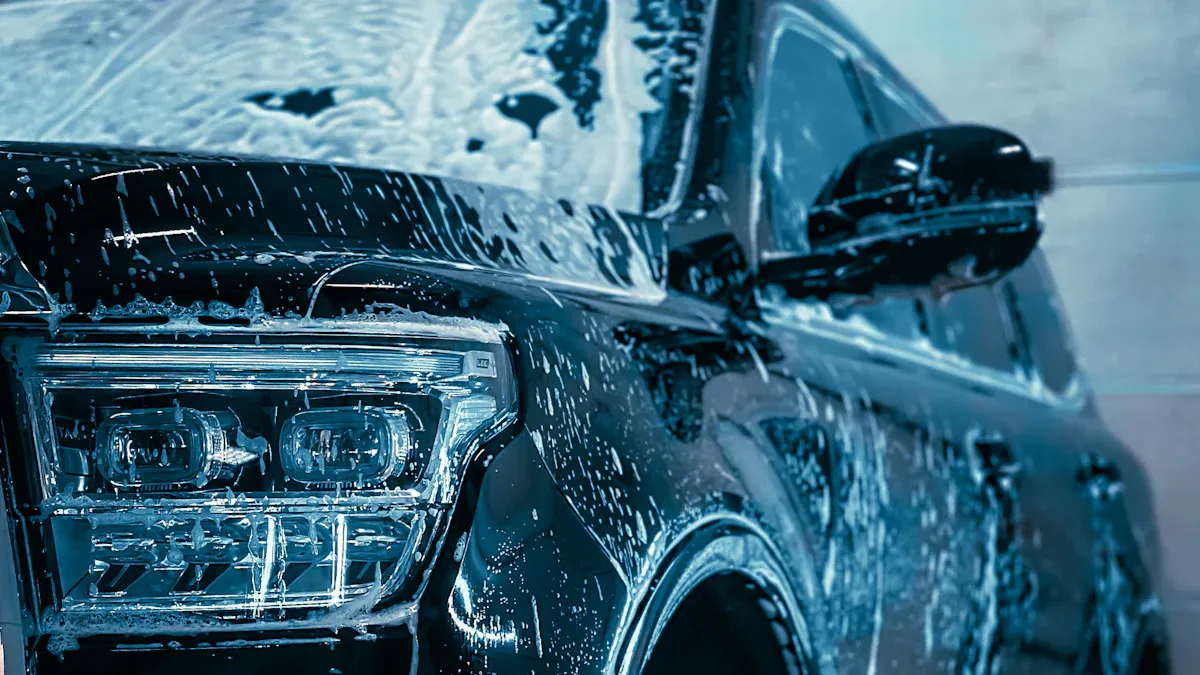
Washing your car with a foam gun feels easy and satisfying. You just fill your Car Wash Foam Gun with soap and water, spray the foam evenly over your car, and let it sit for two minutes. Rinse with a pressure washer, spray on more foam, scrub with a soft brush, rinse again, then dry with a soft cloth. Finish up by vacuuming the interior. Foam guns make cleaning safer for your paint, more effective, and honestly, a lot more fun. More people choose foam guns now because they offer convenience, better results, and support eco-friendly cleaning. The market for foam guns keeps growing as car owners look for smarter ways to care for their vehicles.
What You Need
Image Source: pexels
Car Wash Foam Gun
You need a good Car Wash Foam Gun to get started. This tool makes washing your car easier and more fun. Many people like the Seesa brand because it comes with everything you need:
Nozzle for spraying foam or water
Easy-to-use switch
Thickened body for durability
Pipe connector for a secure fit
Tip: A quality Car Wash Foam Gun spreads foam evenly, which helps loosen dirt and protects your paint from scratches.
Soap and Water
Choose a premium car wash soap made for foam guns. Regular dish soap or household cleaners can harm your car’s finish. Premium soaps create thick foam that clings to your car and lifts away dirt. The International Carwash Association reports that using foam-specific soaps can boost cleaning power by up to 40% compared to regular detergents. Foam also helps prevent micro-scratches and keeps your paint looking new.
Mix the soap with water as directed on the bottle. Most brands suggest a ratio like 1 part soap to 16 parts water. Using the right soap and mix gives you the best foam and the safest clean.
Accessories
A few extra tools make the job easier and safer:
Microfiber towels for drying
Soft brushes or mitts for scrubbing
A pressure washer or garden hose for rinsing
Buckets for rinsing your mitt or brush
Car owners who frequently wash their own cars report that foam washing can save up to 30% of washing time. Using accessories like microfiber towels and soft brushes helps avoid scratching the car’s surface. Foam cannons and the right tools also improve cleaning efficiency, delivering up to 40% better results. These tools work together to give you a spotless, shiny car with less risk of damage.
Note: Always keep your accessories clean. Dirty towels or brushes can scratch your paint.
Preparation
Location
Picking the right spot to wash your car makes a big difference. You want a place that keeps you and your car safe. Look for a flat area with good drainage. Avoid washing on a busy street or near storm drains. If you can, choose a shaded spot. Shade keeps the soap from drying too fast and helps you avoid water spots.
Here are a few things to keep in mind when choosing your location:
Make sure the area is clear of obstacles like bikes, toys, or tools.
Stay away from places where water might run into the street or neighbor’s yard.
Pick a spot where you can move around your car easily.
Keep pets and kids at a safe distance while you work.
Tip: A safe waiting area protects you from water, chemicals, and moving equipment. This reduces the risk of slips or accidents.
Inspection
Before you start, take a few minutes to check your equipment and the area. This step helps you avoid problems and keeps your wash safe and smooth. Walk around your car and look for anything that might cause trouble.
Use this quick checklist:
Inspect hoses and pipes for leaks or cracks.
Check the foam gun and pressure washer for any signs of damage.
Make sure all connections are tight and secure.
Look for any sharp objects or debris on the ground.
Confirm that your soap and cleaning tools are ready and clean.
Regular inspections help you spot hazards early. Many car care experts recommend daily checks of your gear. This prevents leaks and keeps everything running smoothly. Following safety guidelines and local rules also keeps you out of trouble.
Note: Frequent inspection of hoses and pipes prevents leaks that could slow you down or create safety risks.
Setup
Now you’re ready to set up your gear. Gather everything you need before you start. This saves time and helps you stay organized.
Here’s a simple setup process:
Place your foam gun, soap, towels, and brushes within easy reach.
Attach the foam gun to your hose or pressure washer. Make sure the connection feels snug.
Fill the foam gun bottle with the right mix of soap and water.
Test the spray on a small area to check for leaks or clogs.
Keep a bucket of clean water nearby for rinsing your mitt or brush.
Tip: Training yourself to follow these steps every time makes car washing safer and more efficient.
Taking a few minutes to prepare sets you up for a smooth, enjoyable wash. You’ll protect your car, your tools, and yourself. Now you’re ready to get started!
Washing Steps
Image Source: pexels
Mix Solution
Start by mixing your car wash soap and water in the foam gun bottle. Most car wash soaps suggest a ratio like 1 part soap to 16 parts water, but you can adjust this based on how much foam you want. If you want thicker foam, use a bit more soap. If you want to save soap, add more water. There is no single perfect ratio, so feel free to experiment until you find what works best for your car and your local water.
Here’s a simple way to mix your solution:
Pour the recommended amount of car wash soap into the foam gun bottle.
Add water up to the fill line or until you reach the right ratio.
Close the bottle and shake it gently to mix everything together.
Tip: Warm water helps the soap dissolve faster and makes thicker foam.
Using the right mix gives you a thick, clingy foam that lifts dirt off your car. This step helps protect your paint from scratches and makes the rest of the wash easier.
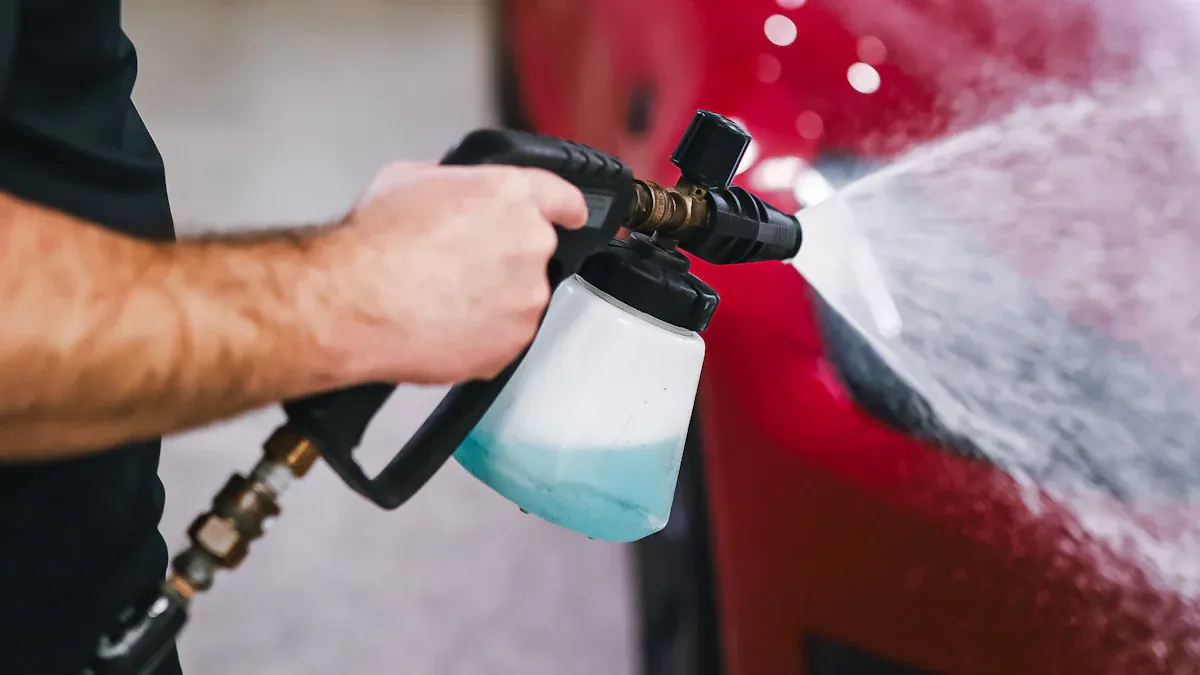
Attach Foam Gun
Now you’re ready to attach your Car Wash Foam Gun to your hose or pressure washer. Make sure all the connections are tight so you don’t get leaks. Most foam guns, like the Seesa model, come with a nozzle, a switch, and a pipe connector. These parts make it easy to set up and switch between spraying foam and rinsing with water.
Follow these steps:
Connect the foam gun bottle to the main body.
Attach the foam gun to your hose or pressure washer.
Check that the switch is in the right position for foam.
Test the spray on a small area to make sure everything works.
Note: Always check for leaks before you start spraying your whole car.
A good foam gun setup saves you time and effort. You can switch between foam and water without stopping to change tools. This makes the wash smoother and more fun.
Apply foam evenly
With your foam gun ready, it’s time to cover your car in foam. Start at the top and work your way down. This lets gravity help the foam flow over the whole car, carrying dirt with it. Make sure the car is dry before you start. Foam sticks better to a dry surface and lifts more dirt.
Spray the foam in slow, even passes. Try to coat every part of the car, including the roof, windows, hood, doors, and bumpers. The thick foam will cling to the surface and start breaking down dirt right away. Experts say that a thick, lubricating foam helps your wash mitt glide smoothly and reduces the risk of scratches or swirl marks.
Move around the car to reach all sides.
Don’t forget the lower panels and wheels.
Avoid spraying in direct sunlight, as foam can dry too quickly.
Tip: The foam gun creates a thick, continuous layer of foam. This means you don’t have to stop and refill buckets, and you get better cleaning with less effort.
Applying foam evenly is one of the biggest advantages of using a foam gun. You get a safer, faster, and more effective wash every time.
Let sit for 2 minutes
After you cover your car in foam, let it sit for about two minutes. This short wait gives the foam time to break down dirt and grime. The bubbles lift dust and road film away from the paint. You do not need to rush this step. Just watch the foam work its magic.
Tip: Do not let the foam dry on your car. If the sun is strong or the weather is hot, keep an eye on the surface. Move quickly to the next step if you see the foam starting to dry.
Letting the foam sit helps you avoid scratches. The dirt loosens and floats on top of the foam. When you rinse, you wash away more grime with less effort.
Rinse with pressure washer
Now grab your pressure washer or hose. Start rinsing at the top of your car and work your way down. The strong water stream removes the foam and the dirt it trapped. Make sure you rinse every part of the car, including the roof, windows, doors, and wheels.
Hold the nozzle a safe distance from the paint. About 12 to 18 inches works well.
Use smooth, steady motions.
Pay extra attention to crevices and trim where foam can hide.
Note: If you use a pressure washer, choose a wide spray pattern. This protects your paint and gives you a gentle but powerful rinse.
A good rinse leaves your car looking cleaner already. You will see the shine come back as the foam and dirt wash away.
Reapply foam
For a deeper clean, spray another layer of foam with your Car Wash Foam Gun. This second round helps remove any leftover dirt. It also gives you a fresh, slippery surface for scrubbing.
Cover the car again from top to bottom.
Make sure you reach all the tricky spots, like mirrors and bumpers.
The thick foam helps your wash mitt or brush glide smoothly.
Pro Tip: If your car is extra dirty, a second foam application makes a big difference. You get better results and protect your paint from swirl marks.
This step sets you up for safe, gentle scrubbing. The foam acts as a cushion between your mitt and the paint. You get a spotless finish with less risk of scratches.
Scrub with soft brush
Now it’s time to get hands-on. Grab your soft brush or a microfiber wash mitt. The foam you just applied acts like a cushion, so you can scrub without worrying about scratching your paint. Always start at the top of your car and work your way down. The roof, windows, and hood usually have less dirt than the lower panels and wheels.
Here’s how you can scrub safely and effectively:
Dip your brush or mitt in a bucket of clean water before you start.
Use gentle, straight strokes. Avoid circles, which can cause swirl marks.
Rinse your brush or mitt often. This keeps dirt from building up and scratching your car.
Pay extra attention to spots like door handles, mirrors, and bumpers. Dirt hides there.
Save the wheels and lower panels for last. These areas collect the most grime.
Tip: Use a separate mitt or brush for your wheels and tires. This prevents brake dust and grit from scratching your paint.
Take your time with this step. The foam and soft brush work together to lift away stubborn dirt, leaving your car’s surface smooth and clean.
Rinse again
After scrubbing, you need to rinse off all the foam and loosened dirt. Pick up your pressure washer or hose. Start at the top and let the water flow down. This helps carry away the soap and dirt without spreading it back onto clean areas.
Hold the nozzle about a foot away from the paint.
Use a steady, sweeping motion.
Make sure you rinse every part, including under the mirrors and around the trim.
Note: Don’t forget the wheels and wheel wells. These spots trap a lot of grime.
Check your car as you rinse. If you see any leftover suds or dirt, give those spots a little extra attention. A thorough rinse sets you up for a spotless, streak-free finish.
Dry with soft cloth
You’re almost done! Drying your car is the final touch that keeps it looking shiny and prevents water spots. Grab a clean, dry microfiber towel or soft cloth. These towels soak up water fast and won’t scratch your paint.
Here’s a simple way to dry your car:
Start at the top and work your way down.
Use gentle, straight motions. Don’t rub in circles.
Flip the towel often so you always use a dry side.
For best results, use more than one towel. Switch to a fresh one when the first gets damp.
Don’t forget the details:
Use a lint-free towel for the glass to avoid any residue.
For the paintwork, a soft towel (like a twist knot towel) is ideal for drying without leaving streaks.

Drying Towel
MATERIAL : Polyester 70% / Polyamide 30%

Glass owel
MATERIAL : Polyester 80% / Polyamide 20%
Be sure to dry the door jambs, mirrors, and around the trunk. These spots often trap water and may drip later. Take a few extra minutes to dry these areas thoroughly, and your car will look freshly detailed every time.
Vacuum interior
You’ve finished washing and drying the outside of your car. Now it’s time to tackle the inside. A clean interior makes your whole car feel fresh and comfortable. Dust, crumbs, and dirt build up fast, especially if you drive every day. Vacuuming keeps your seats, carpets, and mats looking great.
Here’s how you can vacuum your car’s interior like a pro:
Remove floor mats and trash
Take out all the floor mats. Shake them outside to get rid of loose dirt. Pick up any trash, wrappers, or empty bottles from the seats and floor.
Choose the right vacuum
Use a shop vac, a handheld vacuum, or a vacuum with a hose attachment. A crevice tool helps you reach tight spots between seats and under pedals.
Start with the seats
Slide the seats back as far as they go. Vacuum the seat surfaces, backs, and sides. Don’t forget to check the seams and folds—crumbs love to hide there.
Move to the carpets and floor
Work from the front to the back. Use slow, overlapping strokes. Pay extra attention to the driver’s side, where most dirt collects.
Clean the mats
Vacuum both sides of your floor mats. If they’re rubber, you can rinse them with water and let them dry before putting them back.
Hit the hard-to-reach spots
Use the crevice tool for corners, under the seats, and around the center console. Slide the seats forward to reach the back floor area.
Tip: Sprinkle a little baking soda on the carpets before vacuuming. It helps absorb odors and leaves your car smelling fresh.
Quick Checklist for Interior Vacuuming
Area | Don’t Miss These Spots |
Seats | Seams, folds, under cushions |
Carpets | Under pedals, seat rails |
Floor Mats | Both sides, edges |
Trunk/Cargo Area | Corners, spare tire well |
Vacuuming your car’s interior doesn’t take long, but it makes a big difference. You’ll enjoy a cleaner ride, and your car will feel almost new again. Plus, regular vacuuming helps protect your upholstery and carpets from stains and wear. So, grab your vacuum and give your car’s interior the attention it deserves!
Tips for Car Washing
Avoid Circular Scrubbing with Towels
You might feel tempted to scrub your car in circles, but that habit can actually harm your paint. When you move your towel in a circular motion, you risk creating swirl marks and tiny scratches. These marks show up clearly in sunlight and can make your car look dull over time.
Instead, use straight lines when you wipe or dry your car. Move your towel from one side to the other or up and down. This method helps you lift dirt away without grinding it into the paint. If you notice a stubborn spot, gently blot it instead of rubbing hard.
Tip: Always check your towel for dirt before each pass. A clean towel keeps your paint safe and shiny.
Keep Equipment Away from the Paint
Your tools matter just as much as your technique. Buckets, brushes, and hoses can scratch your car if you’re not careful. Place your equipment on a clean surface, not directly on the ground. Dirt and grit stick to anything that touches the pavement.
When you move around your car, watch where you set your tools. Never rest a brush or mitt on the hood or roof. Even a small piece of grit can leave a mark. Hang your towels and mitts on a clean hook or drape them over a bucket.
Keep hoses untangled and away from the car’s body.
Store brushes and mitts in a clean bucket between uses.
Use a separate bucket for wheels and tires.
Note: A little extra care with your equipment goes a long way toward keeping your paint flawless.
Use Microfiber Towels
Microfiber towels are your best friend when it comes to car washing. They pick up dirt and water without scratching your paint. The tiny fibers trap dust and grime, so you don’t just push it around. You get a streak-free finish every time.
Choose high-quality microfiber towels for washing, drying, and buffing. Wash them separately from other laundry to keep them soft and clean. Avoid using fabric softener, which can clog the fibers.
Pro Tip: Use different colored towels for different parts of your car. For example, use one color for paint and another for wheels.
Weather can also affect your car washing routine. A study of 185 car owners found that most people prefer professional car washes during dry weather. When it rains, many choose to wash their cars at home instead. You might find that washing your car yourself, especially with the right towels and tools, gives you better results and saves you money.
Be Cautious with Tire Cleaning
Tires and wheels pick up the most dirt and grime on your car. You see brake dust, road tar, and mud build up fast. Cleaning these areas takes a little extra care. If you use the same tools for your tires and your paint, you risk scratching your car’s finish. You want to keep your paint looking shiny and new, so always treat your tires as a separate job.
Start by grabbing a dedicated brush or mitt just for your tires and wheels. Never use this brush on your car’s paint. Tire grime contains tiny rocks and metal particles. These can scratch your paint in seconds. Keep your tire tools in a separate bucket or container. Label them if you need to.
Here’s a simple tire cleaning routine:
Rinse your tires and wheels with water first. This step removes loose dirt and makes scrubbing easier.
Spray on a wheel cleaner or use your foam gun with a strong soap mix. Let it sit for a minute to loosen grime.
Scrub the tires and wheels with your dedicated brush. Get into the grooves and around the lug nuts.
Rinse everything off with clean water. Check for any missed spots and repeat if needed.
Dry the wheels with a separate microfiber towel. Don’t use this towel on your paint.
Tip: Clean your tires and wheels before washing the rest of your car. This way, you avoid splashing dirty water onto clean paint.
You might notice some stubborn brake dust or tar. For these spots, use a special wheel cleaner or a clay bar made for wheels. Always wear gloves when handling strong cleaners. Protect your skin and avoid breathing in fumes.
Here’s a quick table to help you remember which tools to use:
Area | Brush/Mitt Type | Towel Type |
Tires/Wheels | Stiff or dedicated | Separate microfiber |
Paint | Soft, plush | Clean microfiber |
Stay organized and cautious. You keep your car looking its best and avoid costly scratches. Tire cleaning may seem simple, but a little extra attention goes a long way. Your wheels will shine, and your paint will thank you!
Mistakes to Avoid
Wrong Soap
Choosing the right soap makes a huge difference when you wash your car. Many people grab dish soap or whatever cleaner they have at home. That’s a big mistake. Dish detergents and harsh household cleaners can strip away the wax and protective layers on your car’s paint. You might not notice the damage right away, but over time, your car’s finish will look dull and may even develop swirl marks.
Consumer Reports experts warn that using the wrong soap can harm your car’s finish. They say dish detergent can remove the protective wax and leave your paint exposed. Always pick a pH-balanced car wash shampoo made for cars. These products clean well but keep your paint and wax safe. You want your car to shine, not fade.
Tip: Check the label before you buy. If it doesn’t say “car wash” or “pH-balanced,” skip it.
Skipping Pre-Rinse
You might feel tempted to jump right into washing, but skipping the pre-rinse step can lead to scratches. Loose dirt and debris sit on your car’s surface. If you start scrubbing without rinsing first, you grind that dirt into the paint. That’s how swirl marks and tiny scratches appear.
Experts recommend always starting with a pre-rinse. Use a hose or pressure washer to blast away as much loose dirt as possible. This step protects your paint and makes the rest of the wash easier. Here’s a quick list to remember:
Pre-rinse your car with water before applying any soap.
Focus on areas with heavy dirt, like the lower panels and wheels.
Move slowly to let the water carry away debris.
Note: Pre-rinsing helps your soap work better and keeps your paint looking new.
Letting Foam Dry
Letting the foam dry on your car is another common mistake. Foam works best when it stays wet and active. If it dries, it can leave streaks, water spots, or even soap residue. These marks can be tough to remove and might dull your car’s shine.
Work in the shade if you can. Keep an eye on the weather, especially on hot or windy days. If you see the foam starting to dry, rinse it off right away. Don’t wait too long between steps. A little attention here saves you a lot of trouble later.
Pro Tip: Wash one section at a time if the sun is strong. This way, you never let the foam dry out.
Dirty Tools
Let’s talk about one of the sneakiest mistakes you can make when washing your car: using dirty tools. You might think your wash mitt or towel looks clean enough, but even a little bit of leftover dirt can cause big problems for your car’s paint. Dirt, grit, and tiny rocks get trapped in your tools. When you use them again, you risk scratching your car’s surface. Those small scratches add up over time and can make your paint look dull or even damaged.
You want your car to shine, not show off swirl marks. That’s why you need to keep all your washing gear spotless. Here’s what you should watch out for:
Wash mitts and sponges: These pick up dirt fast. If you don’t rinse them often, you just rub that dirt back onto your car.
Microfiber towels: Even the best towels can trap grit. Always shake them out and check for debris before you start drying.
Buckets: If your rinse water looks dirty, it’s time to change it. Dirty water means dirty tools.
Tip: Use the “two-bucket method.” One bucket holds your soapy water, and the other is just for rinsing your mitt or brush. This keeps dirt out of your clean soap.
Here’s a quick table to help you remember how often to clean your tools:
Tool | When to Clean | How to Clean |
Wash Mitt/Brush | After every use | Rinse with clean water, air dry |
Microfiber Towel | After every use | Machine wash, no fabric softener |
Buckets | After every wash session | Rinse thoroughly, let dry |
You might not notice the damage right away, but dirty tools can ruin your hard work. Always inspect your mitts, towels, and brushes before you start. If you see any dirt or grit, clean them or grab a fresh one. Never use the same towel for your wheels and your paint. Wheel grime is extra gritty and can scratch your car in seconds.
Keeping your tools clean doesn’t take much time, but it makes a huge difference. You’ll get better results, protect your paint, and enjoy that just-washed shine every time. So, next time you wash your car, give your tools a little extra attention. Your car will thank you!
Aftercare
Inspect
You just finished washing and drying your car. Now, take a few minutes to look over your work. Walk around your car and check every panel. Look for water spots, leftover soap, or missed dirt. Pay close attention to the lower panels and around the wheels. These areas often hide grime.
If you spot any streaks or smudges, grab a clean microfiber towel and wipe them away. Sometimes, you might find small scratches or chips. Make a note of these spots. You can fix them later with touch-up paint or a scratch remover. Regular inspection helps you catch problems early. This habit keeps your car looking sharp and protects its value.
Tip: Shine a flashlight on your paint if you wash your car in the evening. This trick helps you see any spots you missed.
Protect
After you inspect your car, it’s time to add some protection. A good protective layer keeps your paint shiny and safe from the elements. You have a few options here. Many car owners use wax, but ceramic coatings are becoming more popular. Ceramic coatings last much longer—sometimes up to five years—while wax usually lasts only a few months.
When you apply a ceramic coating, you create a strong shield over your paint. This shield blocks UV rays, dirt, and water. Your car stays cleaner for longer, and washing becomes easier. Experts recommend detailing your car every four to six months, especially if you drive in harsh weather. If you have matte paint, use products made for that finish. Regular wax or polish can damage matte surfaces.
Here are some quick protection tips:
Use pH-neutral soaps and microfiber mitts for gentle cleaning.
Avoid abrasive washes and harsh chemicals.
Apply maintenance sprays or toppers to refresh your coating.
Consider your climate and driving habits when choosing protection.
A little effort now saves you time and money later. Your car will keep its shine and value for years.
Store Gear
You want your car washing tools to last. Proper storage makes a big difference. After you finish, rinse your foam gun, brushes, and towels with clean water. Let everything air dry before you put it away. Damp towels can grow mold or mildew if you store them too soon.
Keep your gear in a clean, dry place. Hang microfiber towels or fold them neatly in a bin. Store your foam gun and accessories together, so you can find them easily next time. If you use different towels for wheels and paint, label them or use different colors.
Here’s a simple storage checklist:
Item | How to Store |
Microfiber Towels | Washed, air-dried, folded |
Foam Gun | Rinsed, air-dried, upright |
Brushes/Mitts | Cleaned, hung or in bin |
Buckets | Rinsed, stacked dry |
Note: Clean tools work better and last longer. You also avoid scratching your car with leftover dirt.
Taking care of your gear and your car’s finish pays off. You get a spotless car, longer-lasting tools, and a shine that turns heads every time you drive.
Troubleshooting
Even with the best setup, you might run into a few hiccups while washing your car. Don’t worry—most problems have simple fixes. Let’s look at some common issues and how you can solve them.
Weak Foam
You expect thick, fluffy foam, but sometimes you get a thin, watery spray. This can feel frustrating, but you can fix it quickly.
Check your soap ratio. Too much water or not enough soap leads to weak foam. Try adding a bit more soap to your mix.
Use warm water. Cold water doesn’t help the soap dissolve well. Warm water makes thicker foam.
Inspect the soap type. Not all soaps work with foam guns. Always use a car wash soap made for foam guns.
Adjust the foam gun settings. Some models let you control the foam thickness. Turn the dial or switch to increase the soap flow.
Tip: If you still get weak foam, clean the foam gun bottle and nozzle. Old soap residue can block the foam.
Clogs
Clogs can stop your foam gun from working. You might notice the spray gets weaker or stops completely. Here’s what you can do:
Remove the bottle and nozzle. Check for soap buildup or dirt inside.
Rinse all parts with warm water. This helps dissolve dried soap.
Use a toothpick or small brush. Gently clear out any debris from the nozzle or pipe connector.
Check the filter. Some foam guns have a small filter inside. Clean or replace it if it looks dirty.
Note: Regular cleaning after each use keeps your foam gun running smoothly.
Leaks
Leaks can waste soap and water. They also make a mess. If you see water dripping from connections, try these steps:
Tighten all connections. Make sure the bottle, nozzle, and hose fit snugly.
Check the rubber washers. Worn or missing washers cause leaks. Replace them if needed.
Inspect for cracks. Look at the bottle and connectors. If you find a crack, you may need a new part.
Don’t overtighten. Too much force can damage the threads or seals.
Here’s a quick table to help you troubleshoot leaks:
Problem | Solution |
Loose connection | Tighten by hand |
Bad washer | Replace washer |
Cracked part | Replace part |
Pro Tip: Store your Car Wash Foam Gun and accessories in a dry place. This helps prevent cracks and keeps seals in good shape.
With these tips, you can handle most problems and keep your car washing routine smooth and easy.
Washing your car with a foam gun gives you a safer, more effective clean and makes the whole process more enjoyable. When you follow each step, you protect your paint and get better results. Just like studies show foam rolling helps with recovery and flexibility, using the right tools and methods for your car leads to a smoother finish and less risk of damage. Try these tips next time you wash your car and see the difference for yourself!
FAQ
How often should you wash your car with a foam gun?
You should wash your car every two weeks. If you drive in harsh weather or on dirty roads, wash it more often. Regular washing keeps your paint looking fresh and protects it from damage.
Can you use any soap in a foam gun?
No, you should use car wash soap made for foam guns. Regular dish soap or household cleaners can harm your paint. Always check the label for “car wash” or “pH-balanced” before using any soap.
Do you need a pressure washer for a foam gun?
Using a foam gun with a pressure washer will give you better results. While you can attach a foam gun to a regular garden hose, using it with a pressure washer provides thicker foam and a more powerful rinse, making the cleaning process more effective.
Will a foam gun scratch your car?
A foam gun won’t scratch your car if you use it right. Always use clean tools and soft microfiber towels. The foam lifts dirt away, so you don’t grind grit into your paint.
What should you do if the foam gun clogs?
Try rinsing the nozzle and bottle with warm water. Use a toothpick or small brush to clear any debris. Clean your foam gun after each use to prevent clogs.
Can you wash your car in the sun?
It’s best to wash your car in the shade. Sunlight dries soap and water too fast, which can leave spots or streaks. If you must wash in the sun, work quickly and rinse each section right away.
How do you store your foam gun and accessories?
Rinse everything with clean water.
Let all parts air dry.
Store your foam gun, towels, and brushes in a dry place.
Keep towels folded and separate from dirty tools.
Clean, dry storage keeps your gear in top shape for next time.