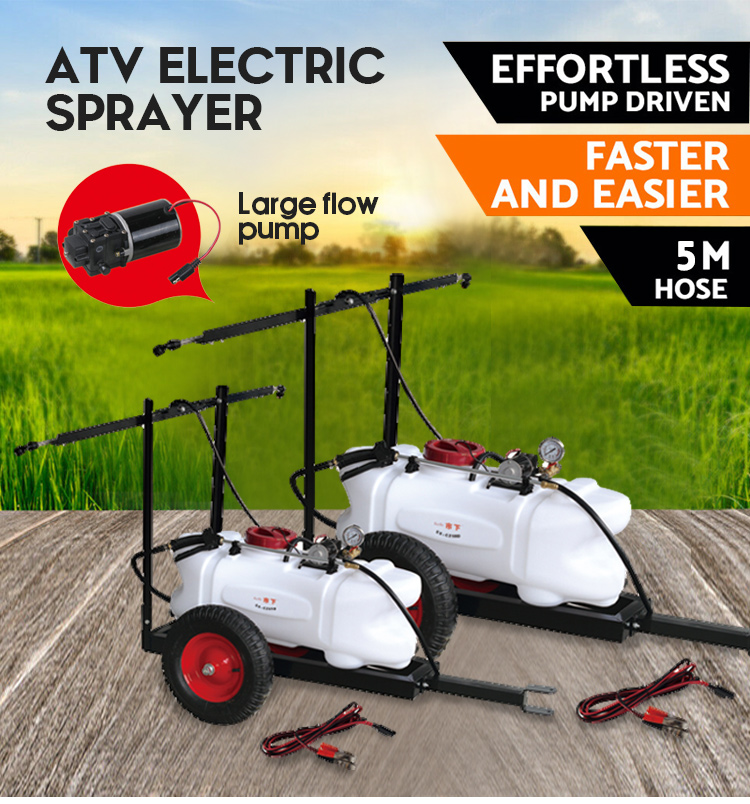
In agricultural operations, missing a narrow spraying window directly impacts your bottom line. Timing proves critical when applying herbicides or fertilizers to your crops. Equipment failure during these vital hours translates into severe yield loss. You also waste expensive labor. You simply cannot afford unexpected breakdowns in the field.
These spraying systems face incredibly harsh environments daily. They endure corrosive chemicals, intense vibrations, and erratic storage temperatures. Reactive repair strategies inevitably lead to sudden diaphragm pump failures. You will also suffer from uneven chemical application. Over time, neglected components silently degrade application precision. They waste expensive fluids and ruin crop consistency.
This guide provides a rigorous, transparent framework to protect your gear. We outline specific steps to minimize daily downtime. You will discover practical methods to shield sensitive pump components. We share expert-backed protocols to guarantee precise chemical delivery. Follow these proven guidelines. They will keep your equipment operating at peak efficiency season after season.
Key Takeaways
Consistent flushing is non-negotiable: 90% of diaphragm pump failures stem from chemical residue crystallization, not mechanical wear.
Precision degrades silently: Unnoticed nozzle wear can increase chemical usage by up to 15%, significantly inflating operational costs.
Winterization requires specific fluids: Standard automotive antifreeze damages internal pump seals; RV antifreeze is the industry standard for safe storage.
The Financial Impact of Proactive Farm Equipment Maintenance
Breakdowns cost far more than a simple replacement part. Mid-field failures waste entire mixed chemical batches. When a pump dies halfway through a field, the remaining mixture often settles. It can crystallize if left sitting too long. You also lose valuable labor hours while troubleshooting the rig. Consider the wages paid to workers who stand idle while you fix a broken machine. Those lost wages accumulate quickly over a season. Furthermore, you risk missing tight weather windows. Rain or high wind can ruin an application if you delay it by just one day.
Proactive farm equipment maintenance directly mitigates these hidden expenses. It ensures your rig stays in the field rather than the repair shop. We must carefully calculate uptime versus downtime. Every hour of downtime multiplies your operational losses.
Degraded seals and clogged lines cause severe pressure drops. This directly damages your chemical cost efficiency. Pressure drops lead to highly inaccurate spray patterns. You might over-apply expensive herbicides in one pass. This burns your crops and wastes money. Then, you might under-apply pesticides in another zone. This allows pests to destroy your yield. Both scenarios threaten crop health. Consistent pressure guarantees you use exactly the chemical volume you planned.
We must also examine manufacturer warranty and compliance realities. Most brands strictly enforce their warranty terms. They will void coverage if a pump fails due to poor flushing habits. Freeze damage also invalidates most claims immediately. Manufacturers can easily spot crystallized chemicals inside a returned pump housing. Documenting your cleaning schedule proves you followed industry standards. It protects your warranty status. It also keeps your operations compliant with local agricultural and environmental regulations.
Daily & Post-Application Protocols: Electric Pump Sprayer Care
Proper electric pump sprayer care begins immediately after your application finishes. You must establish rigorous daily habits. The triple-rinse standard is an absolute baseline requirement. It neutralizes dangerous tank residues effectively. Water alone rarely removes thick oil-based chemicals. It also fails to break down sticky agricultural surfactants. Always use a commercial tank neutralizer formulated specifically for your herbicide.
Here is the standard triple-rinse method you should follow:
Empty the tank completely and rinse the interior walls with clean water. Spray this rinse water over an approved field area.
Fill the tank halfway with water and add your commercial chemical neutralizer. Agitate the mixture. Run it through the booms for several minutes.
Perform a final rinse using pure water. Flush the lines until the output runs perfectly clear.
Diaphragm pumps serve as the heartbeat of your system. They require incredibly careful handling to survive harsh farming seasons. Never run an electric pump dry for extended periods. Operating a dry pump generates intense friction. This friction quickly destroys internal rubber check valves. It melts the delicate seals inside the chamber.
Heat management remains equally crucial for long-term survival. Most 12V ATV electrical systems struggle under constant heavy loads. They generate significant heat during continuous max-pressure operation. This heat degrades pump motors rapidly. Give the motor brief cooling periods between large field sections. Avoid running it continuously at peak PSI if your application allows a lower pressure setting.
Filtration prevents catastrophic internal damage. You must establish a strict daily routine to inspect all filter points. We recognize a clear hierarchy of filtration:
Tank Lid Screen: This primary filter blocks large debris, leaves, and clumps during the initial fill.
Inline Suction Filter: This vital component catches smaller particulate matter before it reaches the pump chamber.
Nozzle Screens: These micro-filters prevent fine grit from distorting your final spray pattern.
Check these screens visually after every single shift. Clean them thoroughly using a soft brush. Preventing debris from reaching the pump valves saves you from costly emergency repairs. It guarantees a smooth flow rate during your next field session.
Precision Component Servicing: Nozzle Cleaning and Calibration
Spray precision dictates your overall chemical effectiveness. Safe nozzle cleaning practices protect your equipment's delicate calibration. Many operators make critical mistakes during field cleaning. Never use metal wire, safety pins, or high-pressure compressed air on plastic orifices. These abrasive tools easily deform the soft polymer materials. A deformed orifice permanently ruins your spray fan. It creates dangerous hot spots in your application field.
Instead, use a soft-bristle brush, like an old toothbrush. Soak the components in a specialized ammonia-based solution. This gently dissolves hard mineral buildup without scratching the plastic. Take your time to scrub away chemical caking safely.
Identifying wear patterns requires both visual and mathematical checks. Visually, look for uneven spray fans. Watch for heavy edges or streaks in the pattern. These visual cues indicate a partial blockage or a deformed tip. Mathematically, you must monitor your flow rate closely. Even a microscopic deformation alters your application volume significantly.
You must implement regular catch-test calibration. This standard framework determines precisely if components need replacing.
Follow these specific steps to execute a precise catch-test:
Fill the main tank with clean water. Do not use any chemicals for this diagnostic test.
Set the operating pressure to your usual spraying PSI.
Use a graduated cylinder to catch the water from one tip for exactly one minute.
Compare the collected ounces against the original manufacturer specification chart.
If the output variance exceeds 10%, cleaning will no longer help you. The orifice is permanently worn. You must replace the component immediately. Ignoring this variance wastes chemicals and inflates your seasonal operating budget heavily.
Nozzle Wear Indicators vs. Recommended Actions
Wear Indicator
Technical Diagnosis
Required Action
Streaky spray pattern
Partial particulate blockage
Soak tip and scrub gently using a soft brush
Flow variance exceeds 10%
Permanent orifice deformation
Replace tip immediately to restore accuracy
Dripping heavily after shutoff
Damaged diaphragm check valve
Replace inline strainer or check valve seal
Winterization and Long-Term Storage Vulnerabilities
Freeze damage destroys more agricultural equipment than mechanical wear. Even minor residual water spells absolute disaster. A hard overnight freeze easily cracks plastic pump housings. It also shatters manifold fittings and bursts rubber hoses. Protecting your agriculture ATV sprayer requires a strict, logical winterization routine.
Never use standard automotive antifreeze in your farming equipment. Automotive coolants contain toxic chemicals like ethylene glycol. These harsh chemicals aggressively degrade rubber pump diaphragms and O-rings. Instead, you must use non-toxic RV antifreeze. RV antifreeze uses Propylene Glycol. It acts as the industry standard for safe, effective agricultural storage. It offers burst protection down to minus 50 degrees Fahrenheit. It remains completely safe for environmental discharge during your spring startup.
Follow this step-by-step logic for proper winterization:
Complete a thorough chemical neutralization. Drain the entire system completely using the lowest drain plug.
Pour a sufficient amount of RV antifreeze into the main tank.
Turn the pump on. Circulate the fluid until you visually see pink antifreeze exiting the spray wand and the boom tips.
Turn the pump off. Leave the control valves in the open position. This crucial step prevents pressure buildup and stops seal compression during long months of storage.
Electrical storage remains equally important. Cold weather and moisture cause severe terminal corrosion. Disconnect all quick-connect wiring harnesses from the battery. Apply a generous layer of dielectric grease to the metal terminals. This simple step blocks moisture. It ensures your electrical connections remain strong and responsive until spring arrives. Store the pump unit inside a climate-controlled shed if possible.
Common Mistakes to Avoid During Winterization:
Relying solely on compressed air to blow out lines. Air rarely removes all standing water from low spots in the hoses.
Leaving the pressure regulator tightly closed. This ruins the internal spring tension over time.
Storing the unit in direct sunlight. UV rays degrade the plastic tank material rapidly and make it brittle.
Decision Framework: Repair vs. Replace for Aging Sprayers
Every piece of machinery eventually reaches the end of its useful lifecycle. Proper ATV sprayer maintenance helps you maximize its working years. However, you must know how to evaluate pump health accurately. This prevents you from throwing good money at a dying system.
Learn to distinguish between a failing pump and a simple fix. Watch for major symptoms of a failing pump. Pulsating pressure, excessive motor noise, or a physically leaking housing usually indicate severe internal wear. Conversely, a blown fuse or a severely clogged inline filter mimics these exact symptoms. Always check your basic electrical connections. Clean your screens thoroughly before you buy expensive replacement parts.
Consider the rebuild return on investment carefully. Sometimes, buying a $30 diaphragm and valve replacement kit solves the entire problem. Rebuilding the pump makes perfect financial sense if the electric motor still sounds strong. However, if the motor struggles, hums loudly, or frequently overheats, a rebuild wastes money. In this scenario, investing in a completely new pump assembly serves you better long-term. A fresh motor guarantees reliable pressure for years to come.
You must also weigh upgrading versus maintaining. Pay attention to indicators showing your current rig no longer meets your operational demands. Farming practices evolve constantly. You might suddenly need precise spot-spraying capabilities rather than broadleaf boom coverage. Spot spraying requires a highly responsive on-demand pump switch. Broadleaf boom coverage requires sustained high-volume output. A pump designed for one task will fail prematurely if forced to perform the other constantly. Furthermore, new, thicker chemical viscosities might require a higher gallons-per-minute (GPM) output. If your current pump cannot push enough volume, modifying it will not help. When your equipment restricts your daily farming practices, an upgrade becomes a strategic necessity.
Repair vs. Replace Evaluation Chart
Observed Symptom
Primary Diagnostic Check
Expert Recommendation
Pulsating or erratic pressure
Inspect inline filters and internal check valves
Clean filters; rebuild if internal valves show wear
Leaking from pump housing
Check for hairline freeze cracks on the casing
Replace entire pump assembly immediately
Motor overheats quickly
Test input voltage and check for wiring shorts
Replace motor or install full pump assembly
Inadequate GPM output
Verify current flow specs against chemical needs
Upgrade to a higher capacity electrical system
Conclusion
Effective upkeep transforms your gear from a disposable consumable into a reliable, long-term operational asset. Consistent, daily routines protect your financial investment. They ensure you never miss a vital chemical application window due to unexpected mechanical failures.
Take immediate action to audit your current equipment today. Review your daily cleaning protocols with your farm team. If you notice inconsistent pressure in the field, initiate the diagnostic steps we discussed above. Listen closely to your machinery. If the pump motor strains under a normal load, investigate immediately. Always perform routine visual checks before you purchase replacement components. Your proactive efforts will dramatically extend the lifespan of your gear. It will keep your operations running smoothly, efficiently, and profitably through every growing season.
FAQ
Q: Why is my ATV sprayer pump running but not building pressure?
A: This usually indicates an air leak in the suction line. It can also stem from a clogged inline strainer or a stuck bypass valve. Check your hoses and clamps first. A running motor means your electrical side works fine. Thoroughly clean the filters before assuming you have a dead pump.
Q: How often should I replace the nozzles on my boom sprayer?
A: Replacement frequency depends heavily on your chemical formulations. Wettable powders are highly abrasive. They degrade orifices much faster than liquid solutions. You should perform a catch-test calibration annually. Replace the components immediately whenever the flow rate variance exceeds 10% of the original manufacturer specifications.
Q: Can I use bleach to clean out my sprayer tank?
A: No. Bleach reacts violently with certain nitrogen-based fertilizers and herbicides. It also aggressively degrades rubber pump diaphragms and internal seals. Always use commercial tank neutralizers. Alternatively, use ammonia-based cleaning solutions if dictated by your specific chemical label instructions. Never mix bleach and ammonia.
Shixia Holding Co., Ltd. was establishes in 1978, that has more than 1,300 employees and more than 500 sets of various injection molding machines, blow molding machines and other advanced equipment.