If your backpack sprayer stops working, start by checking the basics. Look for blockages, leaks, or loose parts. Try a quick troubleshooting checklist before you take anything apart. Most common problems have simple solutions you can handle at home. Always put on gloves and safety glasses before you touch your backpack sprayer or any chemicals. Your safety comes first.
Key Takeaways
Always put on gloves and safety glasses before you use your backpack sprayer or chemicals. This keeps you safe.
Begin troubleshooting by checking the battery, leaks, filters, pump, and tank vent first. Do this before you take anything apart.
Clean your sprayer after each use. This stops clogs, leaks, and pressure loss. Cleaning helps your sprayer last longer.
Look at parts like O-rings, seals, nozzles, and filters often. Replace them if they look worn out. This helps you avoid problems.
Get help from a professional if your sprayer leaks after you fix it. Also get help if the pump or battery does not work, or if you see cracks or smell burning.
Quick Checklist
Immediate Steps
When your backpack sprayer stops working, you can often fix the problem with a few quick checks. Start with these steps:
Check the Battery or Power Source
If you use a battery-powered sprayer, make sure the battery has a charge. Replace it if needed.
Inspect for Leaks
Look at the trigger, hoses, and tank for any signs of leaking liquid. Tighten connections if you see drips.
Clean the Filters and Nozzles
Remove the nozzle and clean it with water. Take out the tank foot filter and rinse it. This helps prevent clogs.
Examine the Pump and Valves
Check the pump lever for smooth movement. Clean and lubricate the pump lever bushings. Inspect the piston and collar for wear or damage.
Check the Tank Cap and Vent
Make sure the tank cap vent hole is clear. A blocked vent can make pumping hard.
Tip: If your sprayer has been sitting unused, flood the pump with clean water before you try to use it. This can help clear out any debris.
When to Seek Help
Sometimes, you may need extra support to fix your backpack sprayer. Here are signs that you should contact a professional or consider replacing parts:
You find worn or damaged O-rings, valve plates, or seals that cleaning cannot fix.
The pump lever feels stuck or loose even after cleaning and lubricating.
The sprayer still leaks after you tighten all connections and replace washers.
Electrical parts like the power switch or micro pressure switch do not work after checking connections.
The spray wand or shut-off valve continues to clog, even after flushing and cleaning.
If you notice these problems, you may need to order replacement parts or get help from a repair technician. Regular inspection and cleaning can prevent most issues, but some repairs need special tools or skills.
Safety Tips
Protective Gear
You should always wear the right protective gear when working with a backpack sprayer. Gloves and safety glasses protect your hands and eyes from chemicals and debris. Long sleeves, pants, and closed-toe shoes keep your skin safe. Many injuries in landscaping happen because workers do not use proper gear or try to lift heavy sprayers without help. A study of Ohio landscaping workers found that overexertion, especially from lifting or carrying backpack sprayers, often leads to back injuries. You can avoid these problems by using both hands to lift, keeping your back straight, and asking for help with heavy loads.
Tip: Always check your gear for damage before you start. Replace torn gloves or broken goggles right away.
Chemical Handling
Handling chemicals safely is very important. Follow these steps to protect yourself and others:
Tighten all hose connections and valves before filling the tank. Test for leaks by tilting the sprayer.
Use a funnel with a fine mesh strainer to avoid spills and blockages.
Fill the tank only to the marked maximum level.
Open and close the tank lid with gloves on. Make sure it seals tightly.
Release any leftover pressure before opening the tank or removing the pump.
Never operate the sprayer above the recommended pressure (usually 5-6 bar).
Read the manual for safe mixing, filling, and disposal instructions.
Note: Most chemical injuries are rare because of good training and safety habits. Always follow label instructions and your sprayer’s manual.
Work Area Prep
Prepare your work area before you start spraying. Clear away tripping hazards like hoses, tools, or debris. Injuries often happen when workers slip or lose balance while wearing a backpack sprayer. Make sure the ground is dry and even. Keep pets and children away from the area. Set up your supplies where you can reach them without stretching or bending too much. Good preparation helps you work safely and avoid accidents.
Backpack Sprayer Priming Issues
Causes
Priming issues can stop your sprayer from working. You may notice that the pump runs, but no liquid comes out. Several common problems can cause this. Manufacturers report these as the most frequent reasons:
The battery does not have enough charge, or it does not sit correctly in the compartment. This can stop the pump from getting power.
The suction tube may have a kink or loose connection. This blocks the flow of liquid from the tank.
Filters can get clogged with dirt or debris. This stops liquid from reaching the pump.
Air leaks in hoses, seals, or connections let air in and break the suction.
Sometimes, trapped air needs to be cleared by cycling the sprayer on and off or by manual priming.
Tip: Always check for these issues first if your backpack sprayer will not prime. Most problems start with something simple.
Solutions
You can fix most priming issues at home. Follow these steps to get your sprayer working again:
Add 2 gallons of warm tap water to the tank. Mix in 2 teaspoons of liquid dish soap. Shake the tank gently to combine the solution.
Tighten the tank lid until it is secure. This helps prevent air leaks.
Turn on the unit. For electric models, flip the red rocker switch to the ON position.
Wait for the pump to start. It may take a few seconds or up to a few minutes for the pump to build pressure.
Squeeze the trigger to spray the soapy solution. The sprayer may need several minutes to prime, especially if you have not used it for a while.
Do not run the sprayer for more than 10 minutes during priming. This protects the pump from damage.
If the sprayer still does not prime, check the battery. Make sure it is fully charged and seated correctly. Inspect the suction tube for kinks or loose fittings. Remove and clean the filter if it looks dirty. Tighten all hose connections to stop air leaks.
Note: Running warm soapy water through the system helps clear out blockages and trapped air. This method works well for most backpack sprayer models.
Pressure Loss
Causes
Pressure loss in your backpack sprayer can make spraying slow or uneven. You might notice the spray pattern weakens or stops completely. Several common problems can cause this issue. You can often spot these problems with a careful inspection.
Worn or Damaged O-Rings
O-rings seal the connections, plugs, and valves inside your sprayer. When these rings wear out or crack, air or liquid escapes. This breaks the seal and causes pressure to drop.
Damaged or Improperly Seated Check Valves
Check valves, like umbrella valves, keep liquid moving in one direction. If these valves get damaged or do not sit correctly, they cannot seal. This lets pressure escape during pumping.
Loose Tank Caps or Damaged Seals
The tank cap must fit tightly. If the cap is loose or the sealing surface is damaged, air leaks out. Even a small gap can cause a big drop in pressure.
Leaks in Hoses or Fittings
Cracks or loose fittings in hoses let air in and liquid out. This weakens the pressure and makes spraying difficult.
Tip: Always check seals, valves, and caps first when you notice pressure loss. These parts often cause the problem.
Fixes
You can fix most pressure loss problems at home. Start by inspecting each part of your sprayer. Use the table below to match symptoms with recommended fixes:
Symptom or Cause | Recommended Fix |
Lever hard to move due to internal plug in pump assembly or valves | Clean and rinse internal pump components, including check valves |
Lever harder to pull up or moves down on its own due to plugged air intake, screen, or inlet valve | Clean and rinse air intake, screen, and inlet valve |
Lever “locked up” because of no air in pump cylinder or air chamber | Drain sprayer and pump handle until air moves freely in pump assembly |
No pressure and lever moves easily due to damaged or unsealed pump assembly or check valves | Inspect and repair linkage from lever to piston or diaphragm; replace damaged O-rings and check valves; check pump assembly for cracks |
You should also:
Replace worn or damaged seals, O-rings, plungers, and diaphragms. Use repair kits made for your sprayer brand.
Tighten the tank cap and check the sealing surface for cracks or dirt.
Inspect hoses for cracks or loose fittings. Replace or tighten as needed.
Clean and triple rinse your sprayer after each use. This removes chemical residue that can clog parts and cause pressure loss.
Store your sprayer with hoses removed and the lid open. Let it dry completely. Keep it away from freezing temperatures to prevent cracks.
Use a tank cleaner, such as Prime Source Tank Cleaner, to keep the inside clean and free of buildup.
Note: Regular cleaning and careful storage help prevent pressure loss. You can avoid most problems by checking seals and valves before each use.
Leaks
Finding Leaks
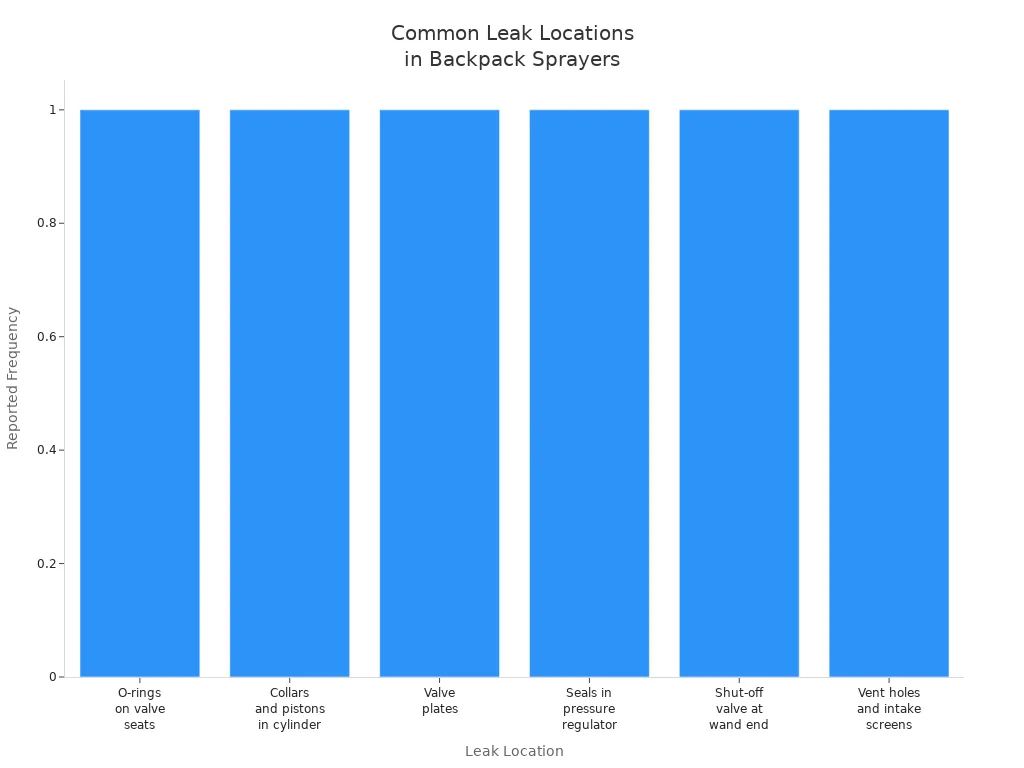
Leaks in your backpack sprayer can waste chemicals and make spraying less effective. You can find leaks by looking at common trouble spots. Most leaks happen at connections or worn parts. Here are the most frequent places you should check:
Hoses and tubing connections inside the tank, especially the breather tube
Tubing that has become disconnected or not attached properly inside the tank
Tubing at the base of the tank and throttle handle
O-rings on valve seats
Collars and pistons inside the pressure cylinder
Valve plates and seals in the pressure regulator
Shut-off valve at the end of the spray wand
Vent holes and intake screens
You can use this table to match leak locations with their causes and solutions:
Leak Location / Problem Area | Description / Cause | Repair Action / Solution |
O-rings on valve seats | Damaged or dirty O-rings | Replace O-rings |
Collars and pistons inside pressure cylinder | Worn or swollen from long-term use | Clean or replace collars and pistons |
Valve plates | Damaged or dirty valve plates | Clean or replace valve plates |
Seals in the pressure regulator | Leaking seals | Check and replace seals |
Shut-off valve at spray wand end | Malfunction or leaks | Clean or replace shut-off valve |
Vent holes and intake screens | Clogged vent holes or intake screens | Clean vent holes and intake screens |
Tip: Always check inside the tank for loose or disconnected tubing. Many leaks start here.
Repair Steps
You can fix most leaks with a few simple steps. Always wear rubber gloves, safety goggles, and protective clothing before you start. Work in a well-ventilated area.
Find the leak location. Look inside and outside the cylinder, at the diaphragm pump, and along the spray wand.
For leaks inside the cylinder, clean or replace collars and pistons that look worn or swollen.
For leaks outside the cylinder, replace damaged O-rings on the cylinder or pressure cylinder.
If you see leaks from the diaphragm pump, replace the diaphragm or O-rings on the diaphragm housing and pressure cylinder.
For leaks at the end of the spray wand, inspect the shut-off valve. Clean or rebuild it if you see damage.
Before you repair, flush the sprayer with water. Release all pressure by locking the shut-off valve open.
After repairs, fill the sprayer with clean water. Pressurize the unit and check for leaks. If you still see leaks, repeat the repairs or replace more parts.
Note: Never use a sprayer that still leaks after repairs. Leaks can cause chemical exposure and waste product.
Battery Problems
Power Checks
Electric backpack sprayers rely on a healthy battery to work well. If your sprayer will not turn on or the spray is weak, you should check the battery first. Many users find that battery problems often come from charging issues or damaged parts. You can avoid most problems by checking your battery after each use and following the care instructions in your manual.
Here are the most common battery-related problems and their solutions:
Battery-Related Problem | Symptom / Effect | Common Causes / Solutions |
Battery charging failure | Battery will not charge | Burned fuse, damaged charger, faulty battery |
Low battery power | Pump does not run or weak spray | Low battery charge, poor cord contact |
Electrical connection issues | Pump failure, sprayer shaking | Loose bolts, dirt inside motor or wiring |
Tip: Always use the charger that comes with your sprayer. Using the wrong charger can damage the battery.
You can follow these steps to check your battery and power supply:
Make sure the battery is fully charged and installed correctly.
Look at the battery terminals for corrosion or dirt.
Replace the battery if it does not hold a charge or gives weak power.
Check all electrical connections for damage or loose wires.
Inspect hoses for air leaks, which can sometimes point to power issues.
Clean filters to keep the sprayer running smoothly.
Try manual priming to see if the pump responds.
Electrical Connections
Good electrical connections help your sprayer work safely and reliably. Loose or dirty wires can stop the pump or make the sprayer shake. You should check the wiring and bolts often, especially if you use your sprayer a lot.
Start by turning off the sprayer and removing the battery. Look for any loose bolts or wires near the motor. Dirt or moisture inside the wiring can cause problems. Clean the area with a dry cloth. Tighten any loose bolts with a small wrench. If you see damaged wires or burned spots, you may need to replace the wiring or ask a repair technician for help.
Note: If your sprayer keeps shaking or will not start after these checks, the problem may be inside the motor. In this case, contact a professional for repair. Regular checks and cleaning help prevent most electrical issues.
Clogs
Nozzle Cleaning
Clogs in your backpack sprayer often start at the nozzle. You should clean nozzles regularly because they are the first part to block. Chemical residues and debris can build up quickly if you do not wash out the tank after each use. Even small amounts of leftover chemicals can dry inside the nozzle and cause problems the next time you spray.
To keep your nozzles clear, follow these steps:
Dispose of any leftover chemicals safely, following the instructions on the label.
Fill the tank halfway with clean water. Shake it to loosen any residue, then empty it.
Refill the tank halfway with water and add a small amount of dish soap. Shake well and spray the soapy solution through the nozzle. This helps flush out any buildup.
Fill the tank with clean water again. Shake and spray until the water runs clear.
Tip: Use a small brush or a cloth soaked in vinegar to scrub the spray tip if you see stubborn dirt. Never use sharp objects to poke the nozzle, as this can damage it.
You should also disassemble the sprayer handle and spray tip to remove any debris. Clean around the trigger and handle with a brush. Run clean water through the system weekly to prevent clogs.
Filter Maintenance
Filters and strainers protect your sprayer from clogs by catching dirt before it reaches the nozzle. If you skip filter maintenance, debris can block the intake channels and cause pumping problems. Storing your sprayer without cleaning it allows chemicals to separate and form films that clog the system.
A good filter routine includes:
Remove and clean nozzles and filters every day.
Flush the tank, hose, and wand with clean water. Keep the basket strainer in place to catch large debris.
Clean the tank’s breather valve to prevent clogging.
Inspect the tank lid gasket and replace it if it is cracked or missing.
Check hoses for damage, especially at bends or kinks.
Hand-tighten all connections to avoid damaging O-rings and gaskets.
Never store chemical mixes in the sprayer.
Note: Clean the flat screen filter at the hose and valve junction with a nylon brush. This keeps your spray pattern even and your sprayer working well.
Pump Lever Issues
Hard to Pump
When you find the pump lever hard to move, you may feel frustrated. This problem often means something blocks the flow or the pump needs attention. You can follow these steps to fix a stiff pump lever:
Fill the tank all the way, usually about 4 gallons, and turn the sprayer on.
Gently shake the backpack sprayer. This helps the pump start working.
Remove the hose from the unit. Test if water sprays directly from the outlet hole. Be ready to turn the sprayer off quickly.
If water sprays out, reconnect each part one at a time. This helps you find any blockages or faulty parts.
Check the pump diaphragm. You can try priming the pump by spraying water into the tank’s fine filter inlet while the sprayer is on.
If you see worn or damaged O-rings or the pump looks old, take the pump apart. Replace any broken parts.
Tip: If you loosen the tank cap and no air escapes, the pump may be damaged. You might need to lubricate or replace it. Take photos as you take the pump apart. This makes it easier to put back together. You can find replacement parts at most home improvement stores.
Loose Lever
A loose pump lever can make spraying difficult and may lead to leaks. You should check the lever’s connection to the pump. Tighten any loose bolts or screws with a wrench or screwdriver. If the lever still feels wobbly, inspect the pivot point for wear. Sometimes, the bushing or washer wears out and needs replacing. You can find these small parts in repair kits. Always test the lever after tightening or replacing parts. A firm, smooth lever helps you spray evenly and safely.
Note: Regular checks and quick repairs keep your pump lever working well and extend the life of your backpack sprayer.
Backpack Sprayer Maintenance
Cleaning Routine
You should always clean your sprayer after you use it. This helps it work better and stops clogs or leaks. First, pour out any leftover chemicals. Follow the label for how to throw them away safely. Next, fill the tank halfway with water. Shake it and pour the water out. Do this again with soapy water. Spray the soapy water through the nozzle to clean inside. Rinse with clean water and spray until the water is clear.
Clean the filter before you use the sprayer to get rid of dirt.
Use a soft brush on the nozzle if you see any buildup.
Rinse the tank three times after each use, especially if you change chemicals.
Let the sprayer dry all the way before you put it away.
Tip: If you clean your Backpack Sprayer after every use, it can last up to five years, even if you use it a lot.
Storage Tips
Storing your sprayer the right way keeps it safe when you are not using it. Always put it in a dry, cool place that does not get too hot or cold. If it freezes, seals and plastic parts can break. Before you store it, let out any pressure in the tank. Take off soft parts like gaskets and O-rings so you can check them. Wash the outside of the tank and pump with warm, soapy water. Pick one person to check the sprayer often and tell someone if there is a problem.
Storage Checklist:
Take apart and clean the sprayer at least once every year.
Do not let it freeze or get too hot.
Keep it in a safe, dry spot.
Change old tips and soft parts before you store it.
Part Replacement
Check the parts that wear out often. Look for cracks, leaks, or if O-rings, seals, and valves feel hard. Change these parts right away to keep your sprayer safe. Clean or change filters and nozzles if the spray looks uneven or if it gets clogged. Put the right oil on pump parts, just like the maker says. If you have an electric sprayer, check the battery and motor to make sure they work. Write down when you change parts or fix things in a notebook.
Part to Inspect | What to Look For | Action to Take |
O-rings & Seals | Cracks, leaks, wear | Replace if damaged |
Nozzles | Clogs, uneven spray | Clean or replace |
Filters & Strainers | Debris, blockages | Clean or replace |
Pump Components | Stiffness, noise | Lubricate or replace |
Battery (if electric) | Low charge, corrosion | Recharge or replace |
Note: If you check and change parts often, your Backpack Sprayer will not break down as much and will be ready when you need it.
When to Get Help
Signs for Support
Sometimes, you cannot fix your backpack sprayer at home. You should know when to ask for help. Watch for these signs:
The sprayer leaks after you replace seals and tighten all connections.
The pump makes loud noises or will not move, even after cleaning and oiling.
The battery does not charge, or the sprayer shuts off quickly after turning it on.
You see cracks in the tank or broken parts that you cannot repair.
The spray pattern stays uneven after you clean the nozzle and filter.
The motor smells like it is burning or feels hot to the touch.
Alert: If you see sparks, smoke, or smell burning from your electric sprayer, stop using it right away. Unplug the battery and call a repair technician.
You should also get help if you feel unsure about any repair. A professional can check your sprayer and fix it safely. Many hardware stores offer repair services for common brands.
Replacement Parts
You can replace many parts on your backpack sprayer yourself. Always use parts made for your sprayer model. Using the wrong part can cause leaks or damage. Here is a table to help you decide when to replace a part:
Part | Replace When You See | Where to Get It |
O-rings & Seals | Cracks, leaks, or stiffness | Hardware store, online |
Nozzles | Clogs, uneven spray | Sprayer dealer, online |
Filters & Strainers | Dirt, blockages, or tears | Garden center, online |
Pump Components | Stiffness, noise, or leaks | Manufacturer, repair shop |
Battery | Low charge, swelling, or leaks | Manufacturer, electronics |
Tip: Keep extra O-rings, nozzles, and filters on hand. Quick replacements help you avoid downtime during busy seasons.
If you cannot find the right part, contact the sprayer manufacturer. They can help you order the correct item. Always check your manual for part numbers and instructions.
You can fix most Backpack Sprayer problems by following simple steps. Check for clogs, leaks, and battery issues first. Clean and inspect your sprayer after each use. Regular maintenance helps prevent future trouble. Always wear safety gear and read the manual before repairs. If you cannot solve a problem, ask a professional for help.
Tip: Stay patient and keep learning. You can handle most repairs and keep your Backpack Sprayer working well.
FAQ
How often should you clean your backpack sprayer?
You should clean your backpack sprayer after every use. This keeps it working well and helps prevent clogs or leaks. Always rinse the tank, hose, and nozzle with clean water.
What should you do if your sprayer will not build pressure?
Check for worn O-rings, loose tank caps, or leaks in the hose. Replace damaged parts and tighten all connections. Clean the pump and valves to restore pressure.
Can you use household cleaners in your sprayer?
You should only use cleaners approved by the sprayer manufacturer. Some household cleaners can damage seals or hoses. Always check your manual before adding any new solution.
How do you store your backpack sprayer during winter?
Empty and rinse the tank. Let all parts dry completely. Store the sprayer in a dry, frost-free place. Remove the battery if your sprayer is electric.