Ever struggled to control weeds in tight spots or needed to manage a sudden pest outbreak? For these common agricultural challenges, the knapsack sprayer is a versatile and essential tool, useful for everyone from home gardeners to professional farmers.
This ultimate guide will explain exactly what a knapsack sprayer is. We will cover how to choose the right one, use it safely, and maintain it for years of reliable service.
Demystifying the Tool: What Exactly is a Knapsack Sprayer?
So, you've probably heard the name, but what is this tool really all about? Let's take a closer look and break down what makes it so useful in agriculture.
The Core Definition of a Knapsack Sprayer
Think of a knapsack sprayer as a special backpack, but instead of books, it holds liquid. It's a portable agricultural sprayer designed to let you apply solutions like fertilizers or pesticides with precision. Because you carry it on your back and operate it by hand, you might also hear it called a manual backpack sprayer. It gives you total control to target specific plants or weeds without affecting the surrounding area.
Anatomy of a Knapsack Sprayer: Key Components Explained
To really understand how a knapsack sprayer works, we need to look at its main parts. They all work together as a team to get the job done.
The Tank: This is the main container where you hold your liquid mixture. It's typically made from durable plastic that can handle various chemicals. They come in different capacities, so you can pick a size that's right for your farm or garden.
-
The Pump Mechanism: You can think of this as the engine of the sprayer. It's the part you operate (usually with a lever on the side) to build up pressure inside the tank. This pressure is what pushes the liquid out through the nozzle. You'll generally find two types:
Piston Pumps: These are great for creating high pressure, perfect for reaching taller plants.
Diaphragm Pumps: These are often quieter and are excellent for handling a wider range of chemicals, including abrasive ones.
The Straps & Harness: Since you'll be carrying it on your back, comfort is a big deal. Good, padded shoulder straps are essential. They help distribute the weight evenly, which makes a huge difference when you're working for an extended period.
The Lance/Wand: This is the long, handheld tube that the liquid travels through. It lets you aim the spray accurately, reach over other plants, or get a closer application without having to bend over too much.
The Nozzle: This small part at the very end of the wand might be the most critical piece of the whole system. The nozzle determines the spray pattern and the size of the droplets. Whether you need a fine, cone-shaped mist for broad coverage or a direct stream for targeting a single weed, the nozzle is what makes it happen.
The Indispensable Role of Knapsack Sprayers in Agriculture
Alright, so we know what they are. But why should you actually have one? It turns out these simple tools are game-changers on the farm and in the garden for some very important reasons. Let's explore the benefits they bring to the table.
Precision and Targeted Application: Less Waste, More Impact
Have you ever tried to get rid of a single weed without accidentally spraying the healthy plants next to it? With a knapsack sprayer, you can. It gives you pinpoint control.
This means you can:
Spot-treat problems right where they start.
Protect nearby crops from damage.
Use less chemical, which saves you money and is better for the environment.
You apply the solution exactly where it's needed, making your efforts more effective.
Unmatched Portability and Accessibility
You can't exactly drive a giant tractor into a greenhouse or up a steep hillside, can you? That’s where the knapsack sprayer truly shines. Because you carry it on your back, you can go almost anywhere.
They are perfect for areas like:
Steep slopes or terraced farms
Dense rows of crops where bigger machines won't fit
Inside greenhouses and polytunnels
Small, irregularly shaped garden plots
Cost-Effectiveness for Farms of All Sizes
Let's talk about the budget. Heavy agricultural machinery can cost a fortune to buy and maintain. Knapsack sprayers, on the other hand, are incredibly affordable. Their initial cost is low, and since most are manually operated, they don't have fuel expenses or complex engines to repair. It makes them a financially smart choice for everyone, from small-scale gardeners to large commercial farms needing a tool for spot treatments.
Labour-Saving Technology for Enhanced Productivity
Think about the time and effort it takes to weed a field by hand. It's tough, back-breaking work that can take days. A knapsack sprayer dramatically changes that equation.
| Task | With Manual Labor | With a Knapsack Sprayer |
| Weeding 1 Hectare | Approx. 140 hours | Approx. 12 hours |
That’s more than ten times faster! Using a sprayer greatly reduces the physical strain, or drudgery, of farm work. It frees up valuable time and energy for other important tasks.
Versatility: One Sprayer, Many Agricultural Jobs
Don't think of this tool as a one-trick pony. It’s more like the Swiss Army knife of agricultural sprayers. With the same piece of equipment, you can handle a wide variety of jobs just by changing the liquid inside.
You can use it for:
Herbicide Application: To control unwanted weeds.
Pesticide Application: To manage harmful insects.
Fungicide Application: To prevent and treat plant diseases.
Fertilizer Distribution: To give your plants a nutrient boost through foliar feeding.
Types of Knapsack Sprayers: Which Model is Right for Your Farm?
When you start shopping, you’ll notice that not all knapsack sprayers are created equal. They fall into three main categories, and choosing the right one depends entirely on the size of your job and how much work you want to do yourself. Let's break them down so you can find your perfect match.
You can think of these as the classic, original design. They are powered entirely by you!
How it works: You use a hand-operated lever, usually on the side of the tank, to pump air inside and build up pressure. This pressure then forces the liquid out when you squeeze the trigger on the wand.
Best for: They are ideal for smaller jobs like gardens, spot-treating a few weeds, or for anyone on a tight budget.
Seesa Brand Manual Knapsack Sprayers are made up of the following main components:
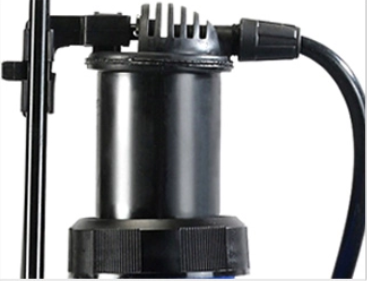
Large Diameter Piston Pump
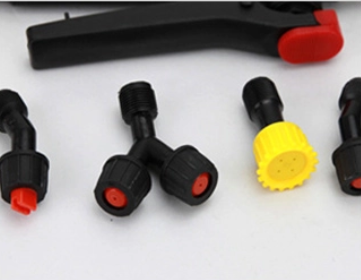
Nozzle Design
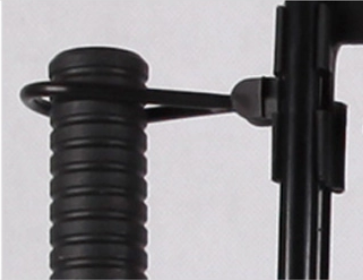
Boom Clamp
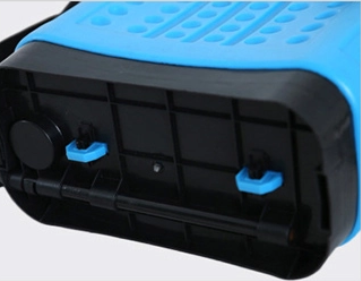
Reinforced Base
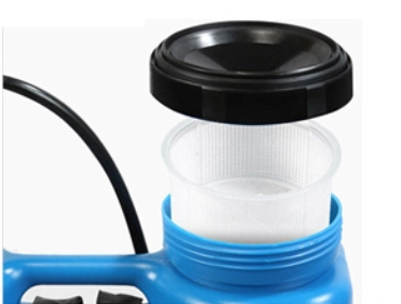
Precision Filter
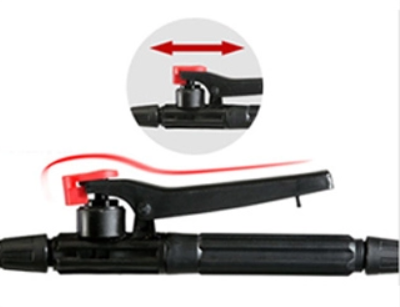
Lockable Switch
| Pros | Cons |
| ✅ Very affordable | ❌ Requires constant physical effort to pump |
| ✅ Lightweight and simple to use | ❌ Pressure can drop as you spray |
| ✅ No need for fuel or charging | ❌ Not ideal for covering large areas quickly |
If you want to take the physical work out of the equation, these are the ones for you. They offer a great middle-ground between manual and gas models.
How it works: A rechargeable battery powers an electric pump inside the sprayer. With the flip of a switch, the pump runs automatically, providing you with a continuous and even spray. No manual pumping is needed!
Best for: These are perfect for medium-sized areas or for long spraying sessions where you want to reduce fatigue. They're great when you need a perfectly consistent spray pattern.
For those looking for a reliable and efficient sprayer, Seesa's Electric Knapsack Sprayer is a great choice. It’s equipped with a powerful Control System and a 12V 10Ah Lead-Acid Battery for extended use. The 12V 2A Diaphragm Pump ensures consistent and high-performance spraying, while the Precision Filter guarantees that the liquid remains free from impurities. The Lockable Switch offers safety and convenience, making it a reliable tool for all your spraying needs.
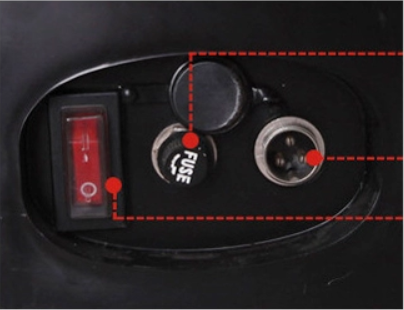
Control System
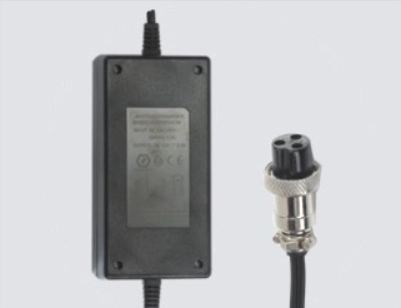
Charger Ac100-240v
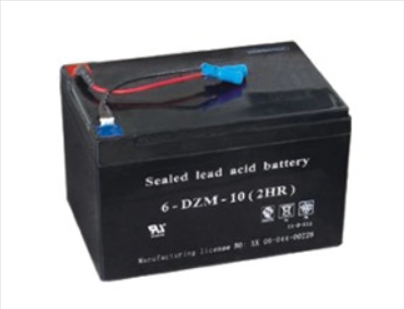
12v10ah Lead-Acid Battery
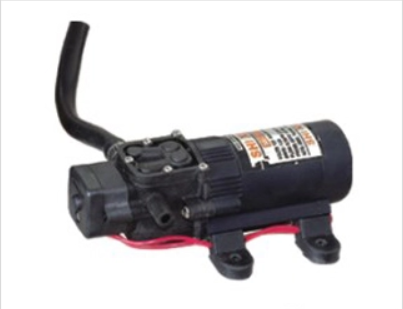
12v2a Diaphragm Pump

Precision Filter

Lockable Switch
| Pros | Cons |
| ✅ Effortless, continuous spraying | ❌ More expensive than manual models |
| ✅ Consistent pressure gives uniform aplication | ❌ Battery needs to be recharged |
| ✅ Quieter than gasoline-powered options | ❌ Can be heavier due to the battery and pump |
When you need maximum power for the biggest jobs, you bring in the gasoline-powered models.
How it works: A small gasoline engine is mounted to the unit. This engine drives a powerful pump, creating very high pressure and a high flow rate. They are designed for heavy-duty, commercial-grade work.
Best for: These sprayers are built for large farms, orchards with tall trees, and any large-scale professional application where speed and power are essential.
For those who need reliable and powerful equipment for heavy-duty spraying, Seesa's Power Knapsack Sprayer is an excellent choice. It comes with robust components designed for high performance and efficiency, ensuring you can tackle large tasks with ease. Key parts include:
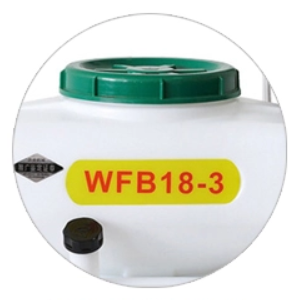
Large Medicine Chest
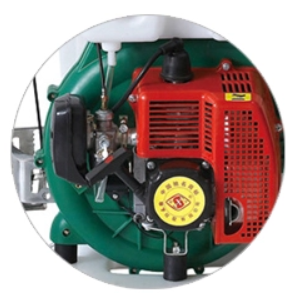
Starting Parts
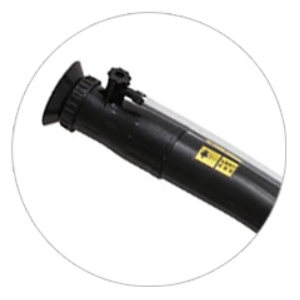
Nozzle Structure
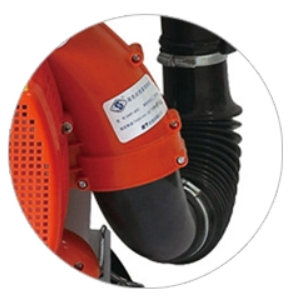
Large Hose
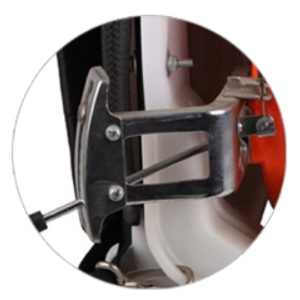
Operating Parts
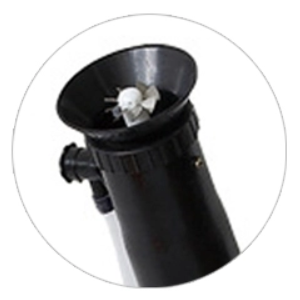
Extended Nozzle
| Pros | Cons |
| ✅ Extremely powerful and high-pressure | ❌ Loud and produces exhaust fumes |
| ✅ Covers huge areas very quickly | ❌ The heaviest and most expensive type |
| ✅ Can spray farther and higher | ❌ Requires fuel and regular engine maintenance |
A Step-by-Step Guide: How to Use Your Knapsack Sprayer Safely and Effectively
Okay, you've chosen your sprayer. Now for the fun part: putting it to work! Using a knapsack sprayer is straightforward, but following the right steps is key to getting great results and, most importantly, staying safe.
Before we start spraying, we need to cover the essentials. Think of this as your pre-flight checklist.
Step 1: Pre-Operation Check and Essential PPE
Safety isn't just a suggestion; it's a must, especially when you're handling chemicals. Before you even think about filling the tank, take a couple of minutes to check your equipment and gear up.
Quick Equipment Check:
Look for any cracks or damage in the tank, lance, and hose.
Check that all seals and connections are tight to prevent leaks.
Make sure the nozzle is clear of any old debris or blockages.
Your Personal Protective Equipment (PPE):
Your safety uniform should always include:
Coveralls: To protect your skin and clothing.
Rubber Boots: To keep your feet protected.
Chemical-Resistant Gloves: Regular garden gloves won't do!
A Face Shield or Goggles: To protect your eyes and face from splashes or drift.
Step 2: Calibrating Your Sprayer for Accurate Dosage
We know this might sound complicated, but calibration is super important. Why? Because too much chemical can harm your crops and the environment, and too little won't be effective.
In simple terms, calibration is like a practice run with just water. It helps you figure out how fast you need to walk and how much liquid your sprayer releases over a set area. This ensures you're applying the perfect amount of solution when you do the real thing.
Step 3: Mixing Solutions and Filling the Tank
Now it's time to mix your solution. Always do this in a safe and well-ventilated area, away from children, pets, and any water sources like wells or drains.
Water First: Always start by filling the tank with about half the amount of water you'll need. This helps the chemical mix better.
Measure the Chemical: Carefully read the product label and measure the exact amount of chemical needed using a separate measuring jug. Don't guess!
Mix It In: Pour the measured chemical into the tank with the water. Then, add the rest of the water to reach your final volume.
Seal and Shake: Securely tighten the sprayer's lid. Agitate the sprayer by giving it a good, gentle shake to ensure the water and chemical are completely mixed.
Pro-Tip: After you pour the chemical into the sprayer, immediately rinse the measuring jug three times with clean water, pouring the rinse water into the sprayer tank each time. This "triple rinse" ensures you use all the product and your jug is clean.
Step 4: Pressurizing and Applying the Spray
With your sprayer filled and your PPE on, you're ready to go.
Put the sprayer on your back and adjust the straps so it sits comfortably. Get it snug, but not too tight.
If you have a manual model, pump the lever to build up pressure. For a battery model, just flip the switch.
-
As you spray, focus on your technique:
Maintain a steady pace as you walk.
Keep the nozzle at a consistent height from your target.
Overlap your spray patterns slightly with each pass to ensure you don't miss any spots.
Step 5: Post-Use Cleaning and Decontamination
Don't just put your sprayer away when you're done! Proper cleaning is vital. It prevents chemicals from building up, stops cross-contamination between different products, and makes your sprayer last much longer.
Safely dispose of any leftover mix according to the chemical label's instructions.
Use the Triple Rinse Method on the tank. Fill it about a quarter full with clean water, seal it, shake it, and spray the water out in a safe area. Repeat this two more times.
Remove the nozzle and any filters and clean them thoroughly with a small brush and water.
Knapsack Sprayer Maintenance: Protecting Your Investment
You've made a great choice by getting a knapsack sprayer, so let's make sure it lasts for years to come. You can think of maintenance as cheap insurance. A little bit of care goes a long way. It ensures your sprayer works perfectly every time you need it and saves you from frustrating breakdowns.
The Routine Maintenance Checklist for Your Agricultural Sprayer
Don't worry, it's not complicated. We can break it down into a simple routine based on when you need to do it.
After Every Single Use:
This is the most critical part of maintenance, and it only takes a few minutes.
Rinse, Rinse, Rinse: We mentioned the triple-rinse method before, and it's essential. Rinsing the tank thoroughly with clean water prevents chemical residue from building up and contaminating your next batch.
Clean the Nozzle and Filters: Take the nozzle off and clean it with water and a soft brush. Don't forget to check and rinse the filters inside the handle or tank. This is the #1 way to prevent annoying clogs.
Periodically (Every Few Months or After Heavy Use):
Think of this as a quick check-up for your sprayer.
Lubricate Moving Parts: Think of the pump lever on a manual sprayer. A little bit of oil or silicone grease on the moving parts keeps it operating smoothly and prevents wear.
Inspect for Wear and Tear: Take a close look at the hoses, seals, and gaskets. Are you seeing any cracks, brittleness, or damage? Replacing a cheap seal now is much better than dealing with a major leak later.
When Storing for the Season:
When you're ready to put your sprayer away for the winter, a few extra steps will make sure it's ready to go next spring.
Find a Good Spot: Store your sprayer in a cool, dry place like a shed or garage. This protects the plastic from getting brittle due to extreme temperatures.
Release the Pressure: Make sure the tank is not pressurized during storage. This takes the stress off the seals and hoses, helping them last much longer.
Avoid Sunlight: Keep it out of direct sunlight. UV rays can degrade the plastic over time, making it weak.
Troubleshooting Common Knapsack Sprayer Problems
Even with the best care, you might run into a few issues with your sprayer from time to time. Don't worry! Most problems are simple to fix with a little troubleshooting. Let's walk through some of the most common ones.
Problem: My sprayer won't build or hold pressure.
You're pumping the handle, but nothing is happening, or the pressure fades away instantly. Here’s what you can check:
Tighten the Lid: This is the most common culprit! If the main cap isn't sealed tightly, air will escape, and you'll never be able to build pressure. Give it a good, firm twist.
Check the Seals: Look at the main O-ring or seal inside the cap. If it’s dirty, cracked, or out of place, it can't create a proper seal. Clean it or replace it if it looks damaged.
Inspect the Pump: Take a look at the pump mechanism itself. There might be a worn-out seal or gasket inside the pump cylinder that needs to be replaced.
Problem: The nozzle is clogged or spraying unevenly.
Instead of a fine mist, you're getting a weak dribble, a crooked spray, or nothing at all. This is almost always a blockage issue.
Clean the Nozzle: Your first step is to unscrew the nozzle tip and clean it thoroughly with a soft brush (like an old toothbrush) and some warm water. If there's a stubborn clog, you can gently clear it with a thin wire or a special nozzle cleaning tool.
Check the Filter: There is often a small filter located in the handle or where the wand attaches to the sprayer. These can get clogged with debris. Take it out and give it a good rinse.
Replace the Nozzle: Nozzles are a wear-and-tear item. If you've cleaned it and it's still not spraying correctly, it might just be worn out. Luckily, they are inexpensive and easy to replace.
Problem: The sprayer is leaking.
Finding drips on your boots or back is a sure sign something is wrong. Leaks not only waste chemicals but can also be a safety hazard.
Check All Connections: Start by checking every point where something screws together—the hose to the tank, the wand to the handle, and the nozzle to the wand. Sometimes they just need to be tightened.
Inspect O-Rings and Seals: Leaks often happen at connection points where a small rubber O-ring or seal has failed. Take the connections apart and inspect these seals. If they look flattened, cracked, or worn, it's time to replace them.
Look for Cracks: In older sprayers, the hose or the wand itself might develop small cracks. Examine them closely for any signs of damage. If you find a crack, you'll need to replace that part.
FAQs About Agricultural Knapsack Sprayers
Q: How heavy is a full knapsack sprayer?
A: A full knapsack sprayer's weight depends on its capacity. A common 16-liter model can weigh over 16 kilograms (about 35 pounds) plus the weight of the unit itself. It's important to choose a size that you can comfortably and safely manage when it is full.
Q: Can I use different chemicals (e.g., herbicide and fertilizer) in the same sprayer?
A: Yes, but only if you meticulously clean the sprayer between uses to prevent cross-contamination. Traces of herbicide can easily damage or kill crops if you later use the sprayer for fertilizer. A thorough triple-rinse cleaning is essential to ensure safety.
Q: What is the difference between a piston and a diaphragm pump knapsack sprayer?
A: Piston pumps typically generate higher pressure, which is ideal for reaching taller plants. Diaphragm pumps are generally quieter and are better suited for handling a wider variety of chemicals, including abrasive powders, because the pumping mechanism is sealed off from the liquid.
Q: How often should I replace the nozzle on my sprayer?
A: You should replace the nozzle based on its condition, not a fixed schedule. If the spray pattern becomes uneven, distorted, or inconsistent even after you have cleaned it thoroughly, it is worn out and needs to be replaced to ensure accurate application.


